


I was going to make a wood round table and paint the top white when I realized we had some extra penny tile and I could give the wood round a tile table top makeover. Tiled top furniture is so cute for outside. It feels so summery and I needed an outdoor coffee table for out deck. I wanted to share with you how I created a tile top table with the extra penny tiles and a wood round. Now, FYI, I did build this a little unconventionally…

The tile sheets we have are small penny tile from a project. We had a few boxes left that were opened and we couldn’t return them. I also had grout left from our recent kitchen subway tile backsplash project(which I still think is amazing.) I also wanted to use up.
Supplies to Make a Small Round Tile Top Table
To make this table with a tiled top you’ll need:
– a wood round or a piece of plywood cut in a circle to size
-Outdoor paint and brush
-Unsanded grout
-Tile mortar or adhesive
-Pre-made legs
-L brackets, outdoor paint
-Copper strapping
-Construction adhesive
-Adhesive spreader
While I built my own table, you could also use either a thrifted table or a pre-made table like Ikea’s lack side table. I was just kind of winging it to match the picture in my head.
Paint all of the Table Pieces First with Outdoor Paint

Paint all of the pieces of the table with outdoor paint if this is going to be outside exposed to the elements.
Tip: If you want to make a square version, use small mosaic square tiles and there’s no cutting with that project either to make a mosaic tile table! Just add an extra leg, and then use the extras to create coasters!
Build the Legs or Use Pre-Made Ones
To make the table legs I cut 2 x 3 ‘s. so that one piece was 2 inches taller than the other and screwed them together so table sits about 15 inches off the ground. The home improvement store will pre-cut these for you. By creating a staggered leg, Tthe top would have a ledge to rest on for more support,and thought the the design to be interesting to look at and have more of a Midcentury Modern feel. It won’t hold a ton of weight, so I wouldn’t out a lot of weight in it, but it should be fine for a few raspberry gin fizzes and a magazine or two. At first I wanted it to be this really awesome, bright blue color, and really pop on my deck, so I base coated everything in a bright blue paint.
Attach the Legs
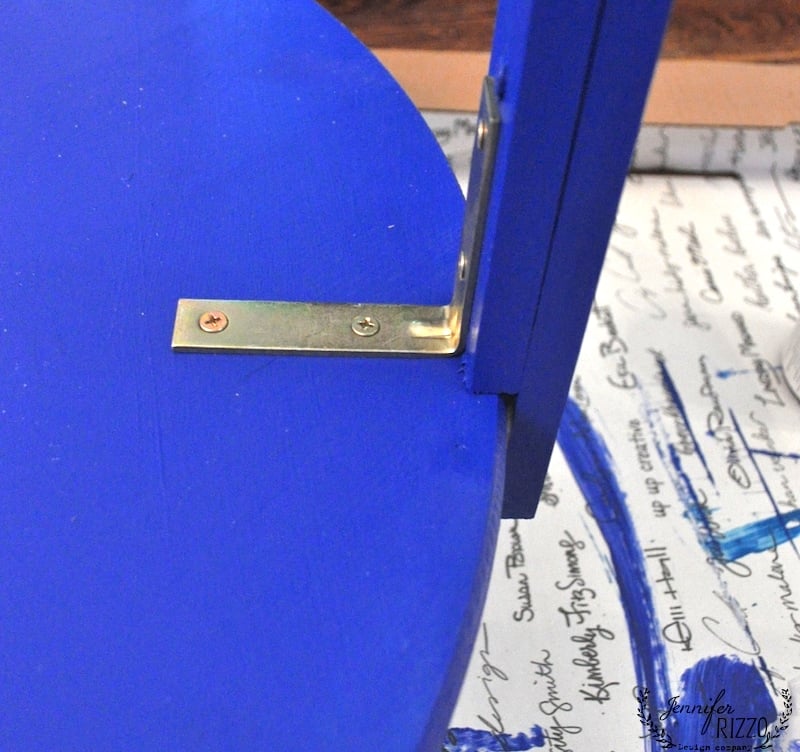
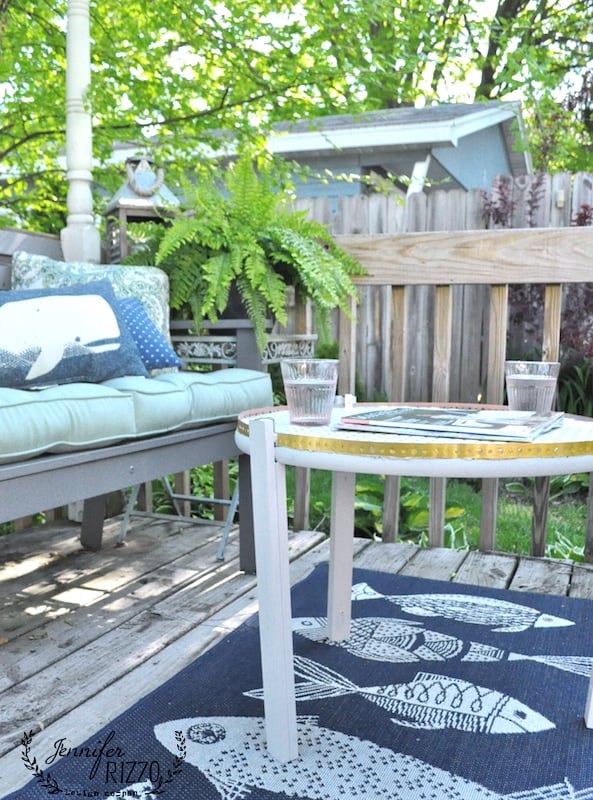
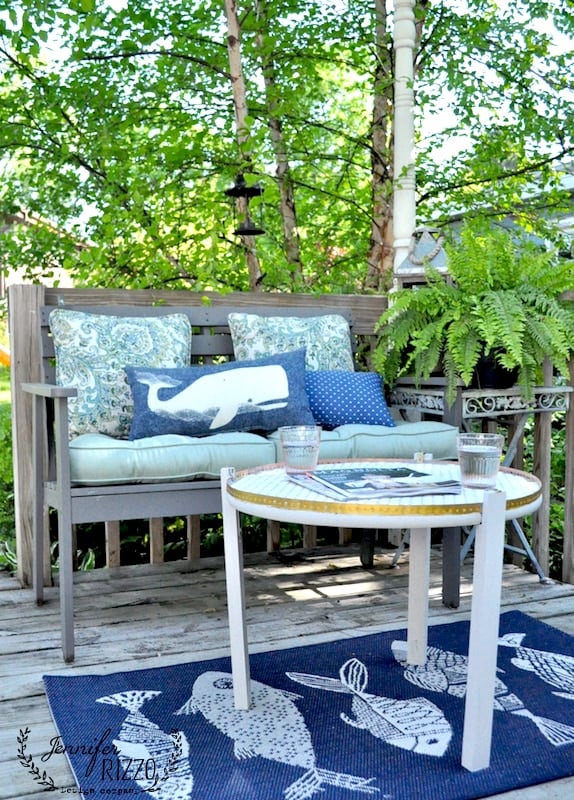
I used L-brackets to attache the legs to the tabletop. I pre-painted everything first, thinking it was going to be such a time saver later, and that I was so clever, because that way I wouldn’t have to paint around the L-brackets later, except after I was finished I hated the blue paint and decided to repaint it. Ha ha. Pre-planning generally gets me nowhere. That’s why in the finished images you’ll see my tiled coffee table painted gray. After the paint was dry, I assembled the table together with wood screws and wood glue and L brackets. I glued and used the gold l-brackets to attach the legs to the round top, realizing I really didn’t need to have the top painted since I was going to be tiling it, so I made it the underside. I figured this way it would be sealed from the elements.
Add a Decorative Trim
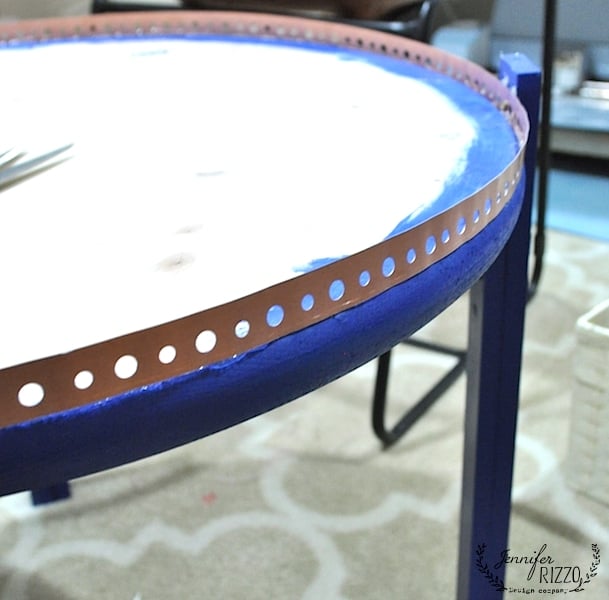
I flipped it over and added my copper strapping as an edge by gluing it on with strong, permanent adhesive such as Power Grab. You don’t have to use the strapping, but it makes for an interesting finished edge. Because the strapping has holes, I ran a piece of painters tape around the outer part when I grouted to keep it from squeezing out like play dough.
Glue the Penny Tile on top of the Wood Round
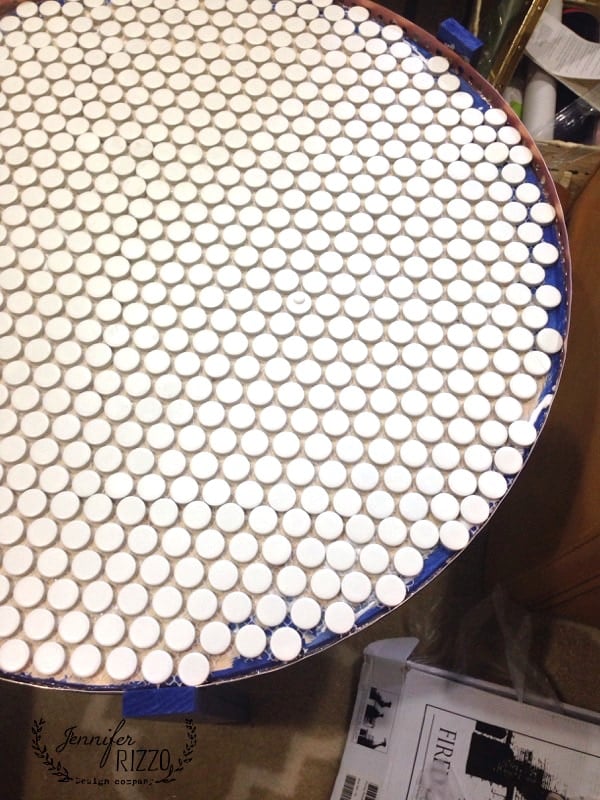
While this can be adhered with traditional tile mortar, I opted to glue mine on with a construction adhesive. When making your tile tabletop with penny tile, because is so small, it’s ok to not have to cut it with a tile saw and just remove tiles along the edge filling it in with grout instead.
Grout the Tiles
This makes it easy especially if you don’t have a tile cutter. It’s ok for it to not be perfect. Lay out the ceramic tiles first before using the tile adhesive to get a good feel for design and spacing and see how to jigsaw puzzle pieces the tile pieces for the penny tile table top. This would be fun to create a mosaic patter with other penny tiles of the same size but different colors like a vintage bathroom floor. The grout would fill the empty spaces where the tile don’t quite meet the edge on the top of the table. After mapping out your tile, spread on the adhesive and set your tile. After 24 hours when the tile adhesive is dry, spread the grout with the grout float, making sure it goes between all of the tiles and cleaning up what ever squishes over the edge. Wipe the excess grout off of the top of the tiles right away with a damp sponge to avoid a long-term haze. A grout sponge or a large foam sponge works best. Make sure to repeatedly rinse the sponge in a bucket of clean water between each pass to get the DIY tile table top clean. For best results follow the package instructions on both the tile adhesive and grout containers.

I initially finished it by painting the trim in gold, and adding some decorative L-brackets on the top of the legs and a little gold accent. You know what. I hated it… in blue. I mean, I love the paint color, it just didn’t look right for me. Luckily, I have so much paint, that I went through my stash and found a pretty gray paint,so, I repainted it. So much for pre-planning.
Once Painted Seal with an Outdoor Sealer
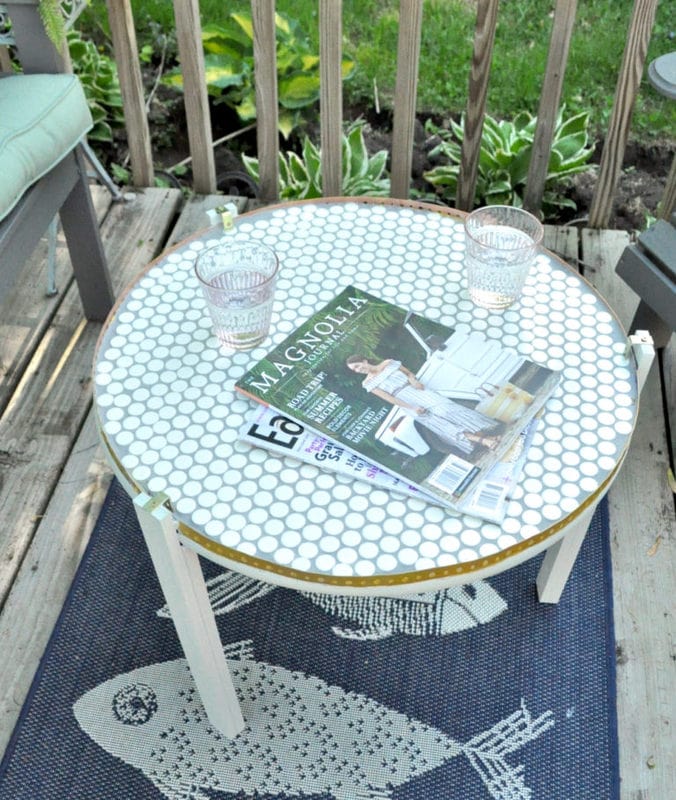
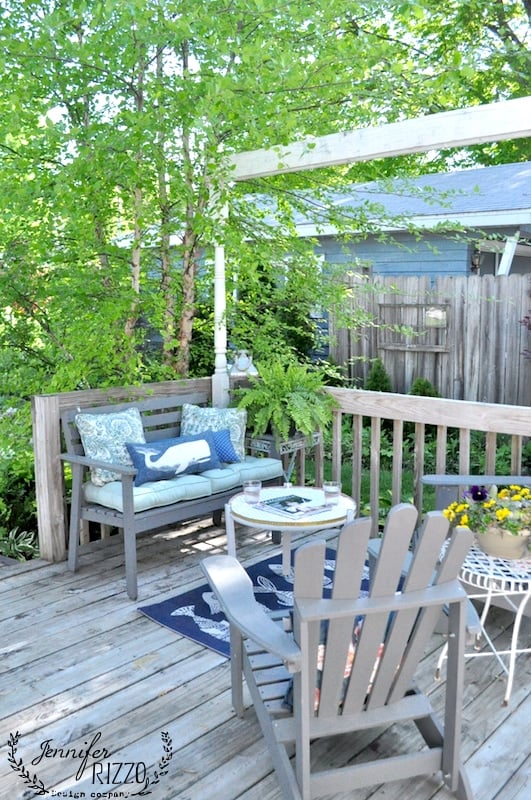
Use an outdoor sealer to prolong the paint job and tile work. I lovedit painted gray. It was perfect for hanging out on our back deck (make sure to check out our replacement new patio!).
It’s the perfect little table for our outdoor space, I might even bring it into our living room once the season is over. If you’re looking for another unconventional round table, see how I also built this one.
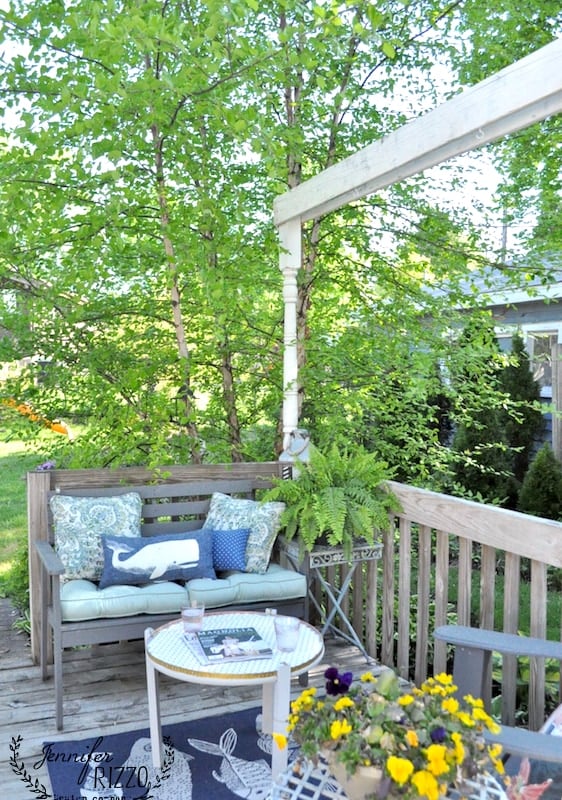
Sitting out on our deck reading is one of my favorite summer past times, and now we have a little table to complete the space that feels very woodys and resort-y. The birch tree has really grown in the last few years, and adds nice dappled summer shade and privacy.
These are the paint colors I used before…. and after. Ha ha ha.

Using outdoor paint is the best paint of this project.
As you can see, I’ve used this paint and these colors for quite a few projects. Morning Glory , Patio , and Gold .

I’ll let you know how it holds up after a bunch of extreme Chicago weather. I know I’ll enjoy hanging out reading.

This post is sponsored by DecoArt, opinions are all my own.

